Setting up a Meshtastic node
Meshtastic lets small LoRa radios send messages without cell service, Wi-Fi, or internet. The trick is getting the hardware, firmware, region, and app pairing set up correctly before you start yelling at a tiny circuit board like it owes you money.
Pick the right hardware
A Meshtastic node is usually a small LoRa radio board running Meshtastic firmware. Some boards have a screen, GPS, Bluetooth, Wi-Fi, battery charging, or a case. Others are bare boards that look like they escaped from a robot autopsy.
For a first node, keep it simple. Get a supported board, the correct frequency version for your region, a proper antenna, and a USB cable that actually transfers data.
- Use supported Meshtastic-compatible hardware. The Heltec V3 and V4 are a very good starter node. Amazon Afiliate LINK
- Buy the correct radio band for your country
- Use a real antenna before powering on
- Do not trust mystery USB cables. Some cables are for charging ONLY some have the extra cable that will let you program the Meshtastic board
There are a lot of Meshtastic-compatible boards on the market, and it’s easy to get overwhelmed. For your first node, you don’t need anything fancy — just something reliable that’s known to work well. Starting cheap is fine, but don’t go so cheap that you end up fighting the hardware instead of learning the system. Prevent the classic mistake: buying random AliExpress junk and wondering why nothing works.
The most important thing is making sure you buy the correct frequency version for your region. For example, in the United States you’ll typically want a 915 MHz (US) board. Buying the wrong frequency version is one of the fastest ways to end up with a node that “works” but can’t talk to anyone else.
Some boards come as bare modules, while others include useful features like built-in batteries, screens, GPS, or weatherproof cases. For beginners, a board with Bluetooth and USB support is usually the easiest to set up and manage with the mobile app.
If you decide you like Meshtastic later, you can always upgrade to a better setup — like a solar-powered node, a higher-gain antenna, or a dedicated router node placed in a better location. But for now, focus on getting something simple that lets you learn how the system actually works.
In short: start simple, make sure the frequency is correct, use a decent antenna, and get a working node before worrying about upgrades or fancy builds.
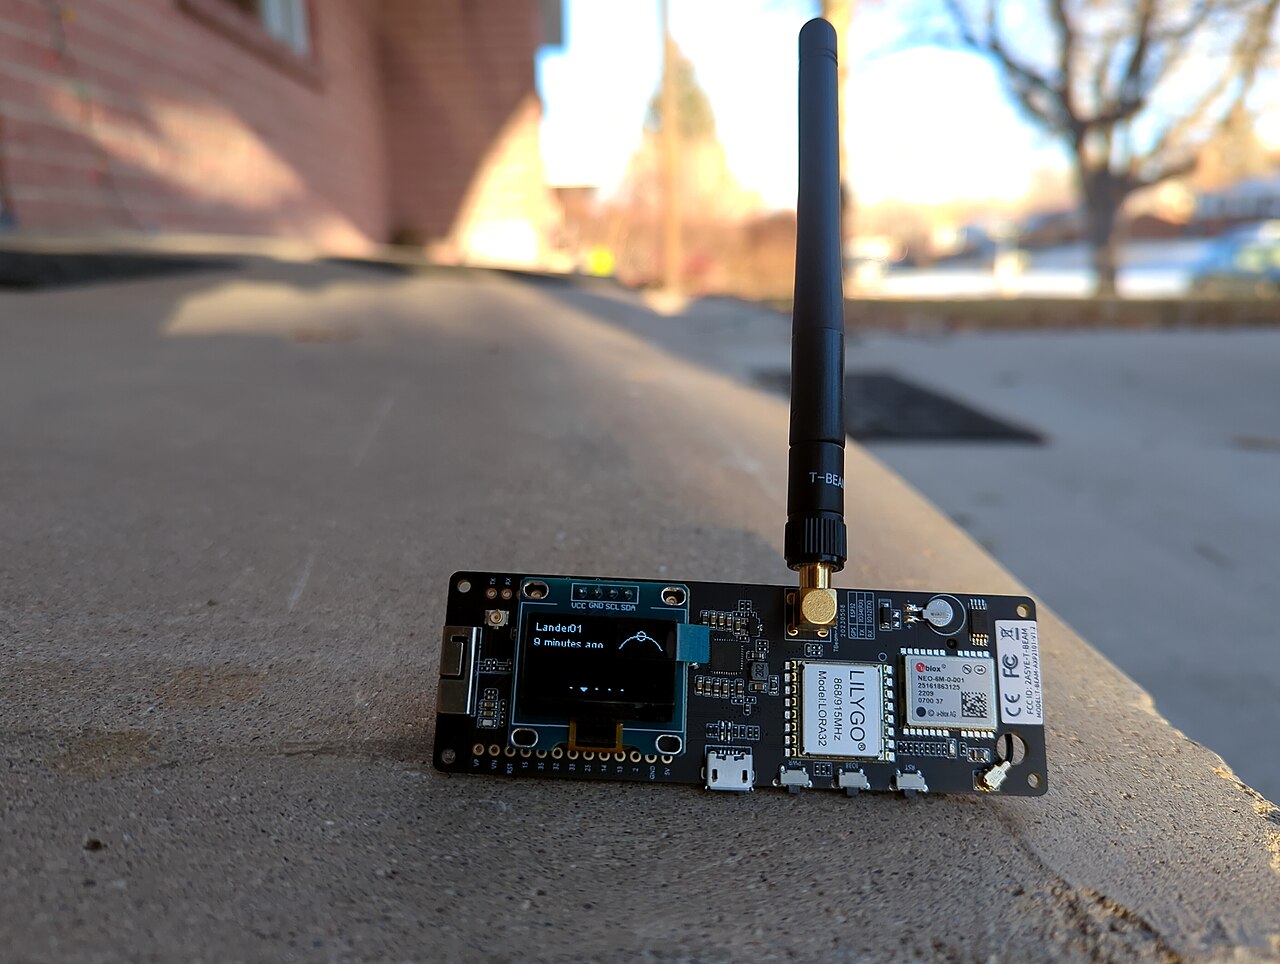
Attach the antenna first
Before you power up the node, attach the antenna. Running radio gear without an antenna is one of those “congrats, you played yourself” moments.
The antenna needs to match the board’s frequency range. A random antenna from a junk drawer may physically fit and still perform like hot garbage.
- Attach the antenna before powering the node
- Use the correct antenna for the radio band
- Keep antennas vertical for normal use
- Upgrade later if range is weak
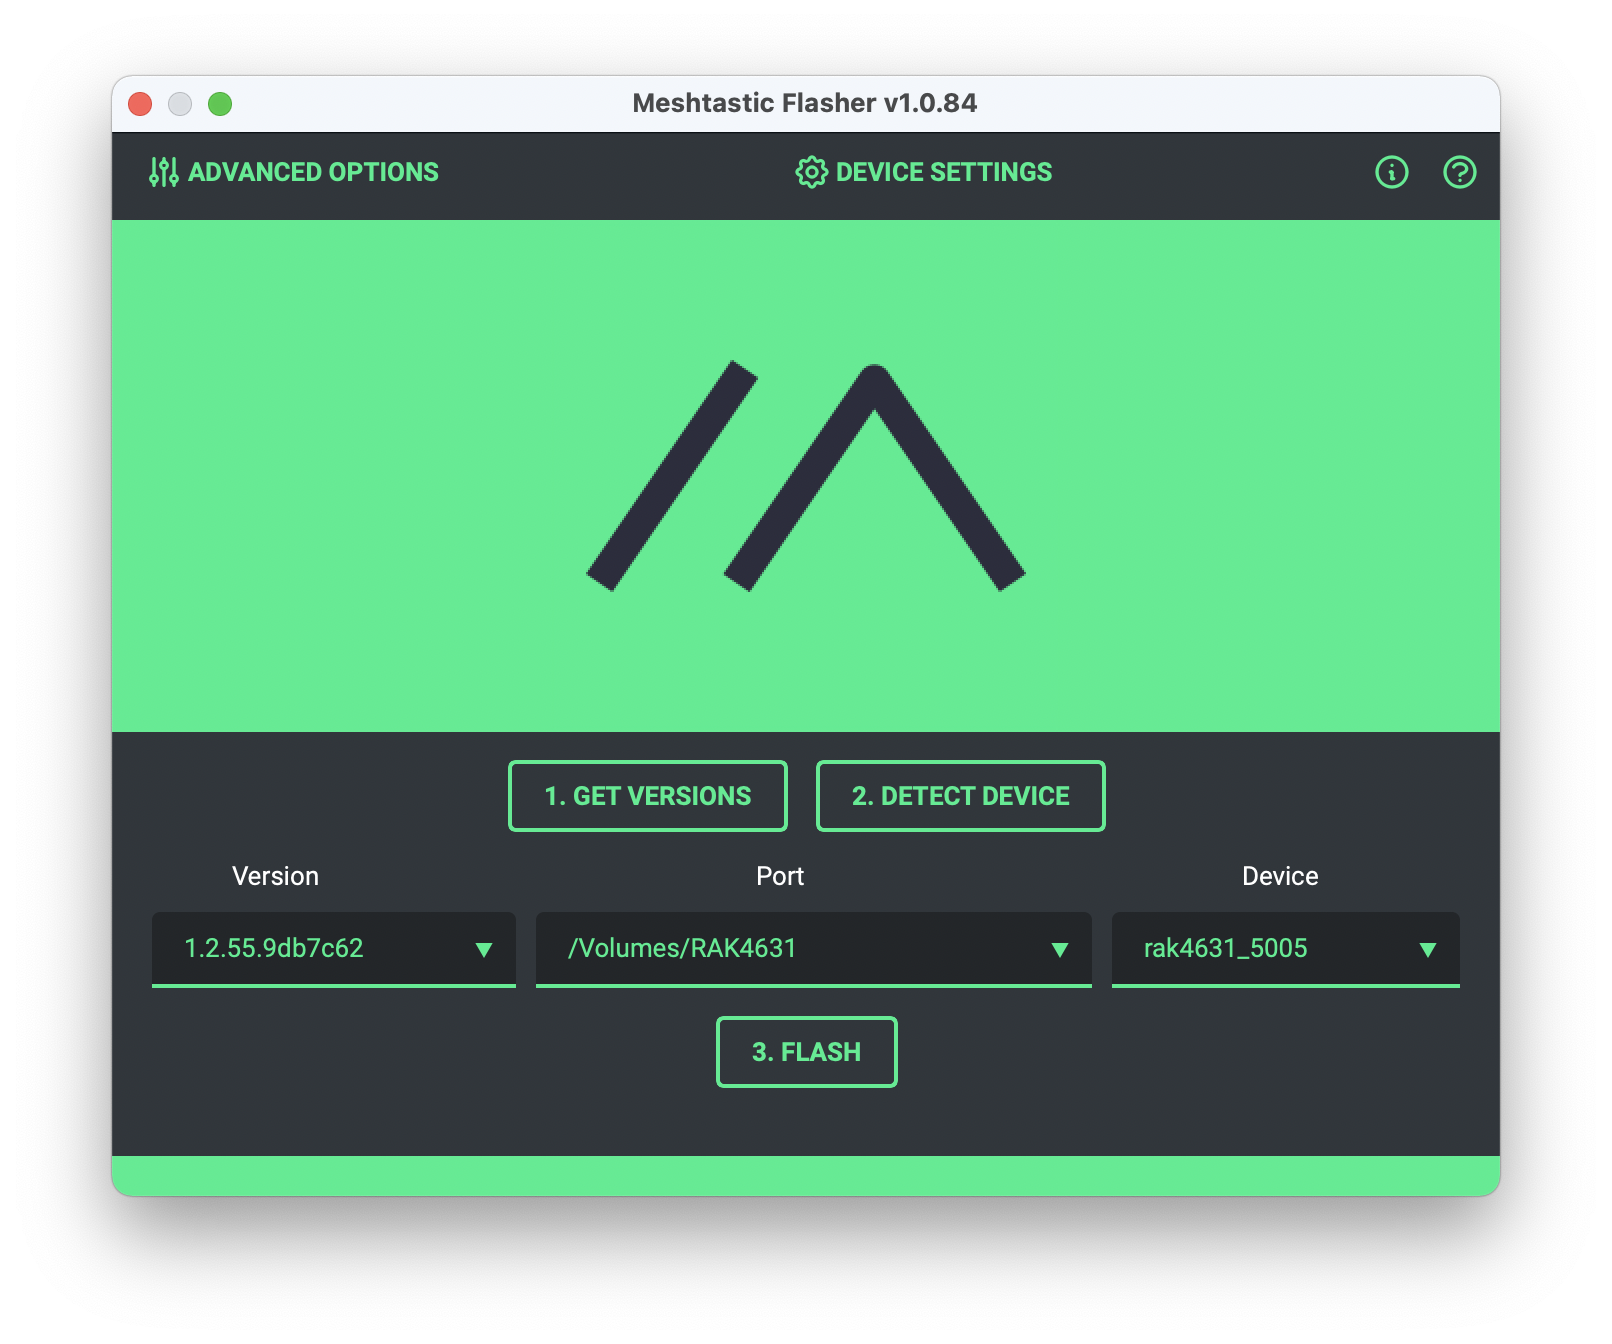
Flash or update the firmware
Many devices ship with firmware already installed, but you may still want to update it. The easiest path is usually the official Meshtastic web flasher Found Here using a browser that supports serial flashing.
Pick the correct device model, use a stable firmware release unless you enjoy chaos, and let the flash process finish before unplugging anything.
- Use the correct firmware for your board
- Stable releases are best for normal users
- Do not unplug during flashing
- Reboot after flashing if needed
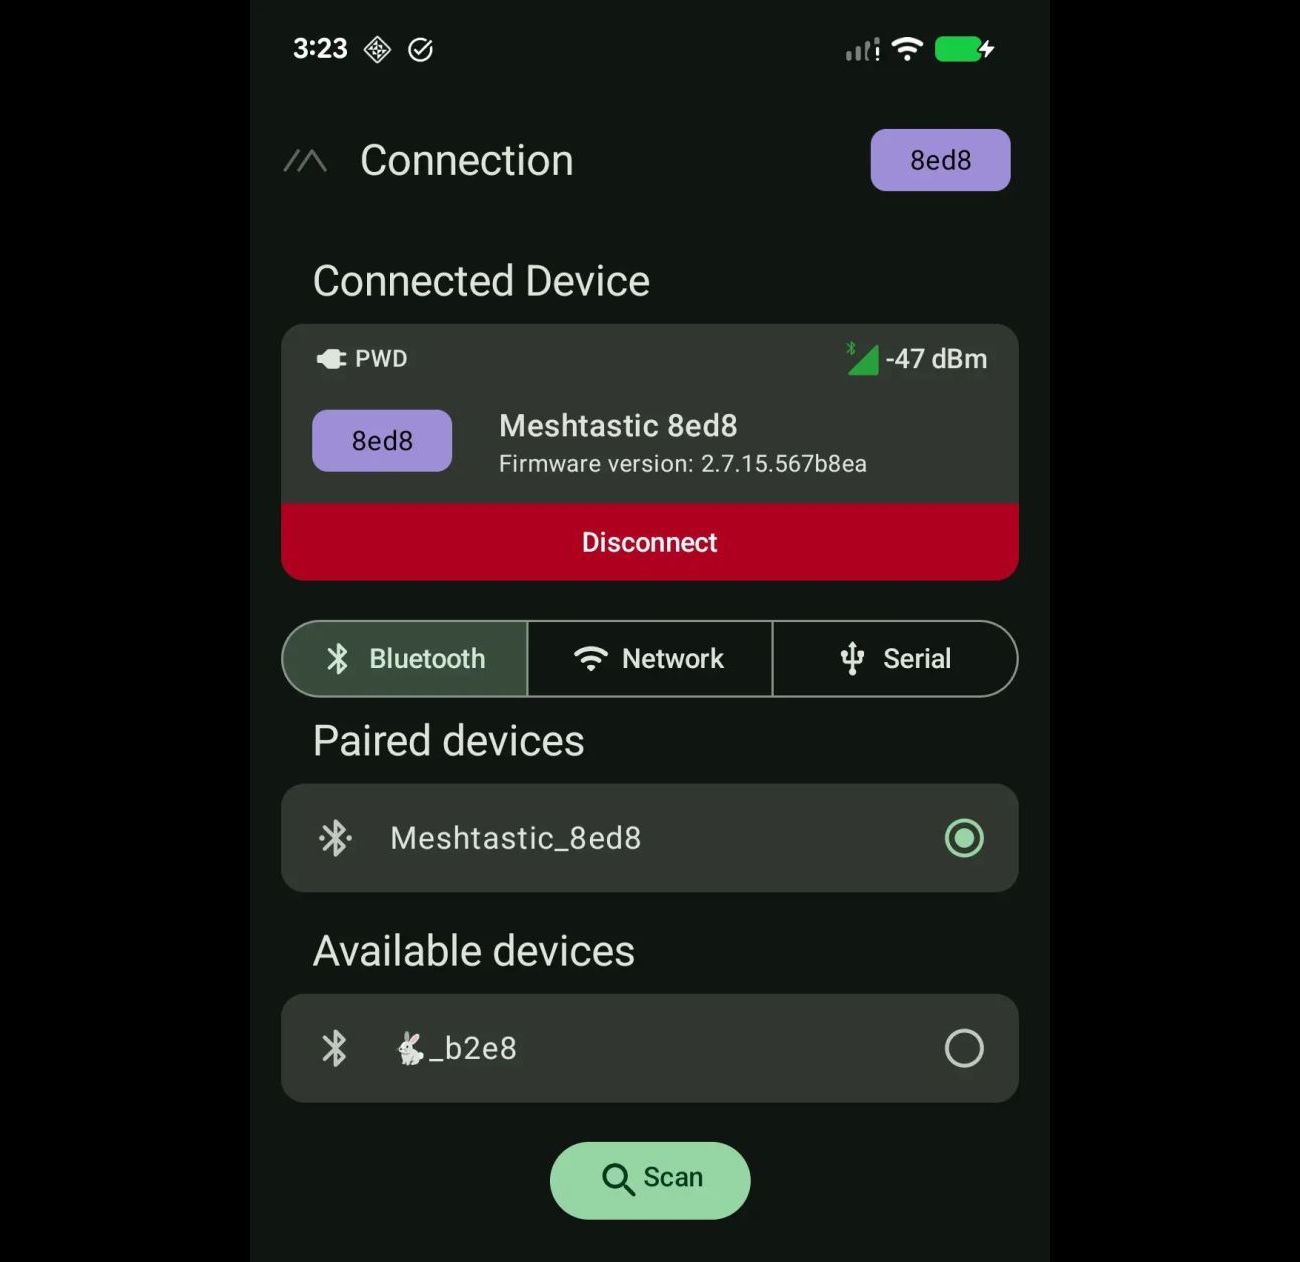
Pair it with the app
Your phone or computer is how you configure and use the node. Most people pair over Bluetooth, but USB and network options can also exist depending on the hardware.
Open the Meshtastic app, connect to the device, enter the pairing code if needed, and confirm the node appears in the app before changing settings.
- Install the Meshtastic app
- Pair over Bluetooth or connect by USB
- Enter the pairing code if prompted
- Confirm the app sees the node
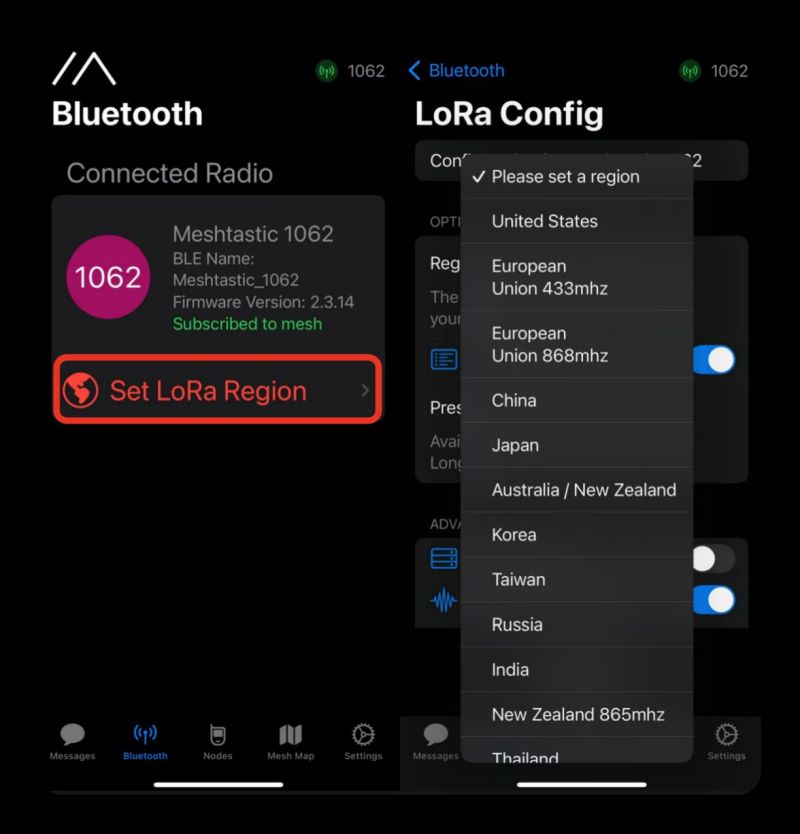
Set your region
This part matters. The region setting controls what frequency range your node uses. If the region is wrong, your node may not communicate correctly and may not follow local rules.
In the app, go to the LoRa or radio configuration section and set the region for where you are. For the United States, that usually means the U.S. region setting.
- Set the correct region before normal use
- Region controls frequency behavior
- Wrong region can break compatibility
- Follow local radio rules

Understand channels before changing everything
Meshtastic channels are where your messages live. The default public-style setup is useful for testing, but private groups should use their own channel name and key.
Do not randomly change advanced LoRa settings unless you know what they do. If your settings do not match other nodes, congratulations, you made a tiny lonely island.
- Use default settings for first testing
- Private groups should use their own channel
- Nodes must share compatible settings
- Do not go full mad scientist immediately
Place the node where radio can breathe
LoRa can work impressively well, but it is still radio. Height helps. Clear paths help. Windows are better than basements. Outside is usually better than inside.
If your node is buried behind a monitor, under a desk, next to metal junk, and surrounded by walls, do not act shocked when it performs like a potato.
- Higher placement usually improves range
- Keep it away from metal clutter
- Try windows or outdoor placement
- Use weather protection outdoors


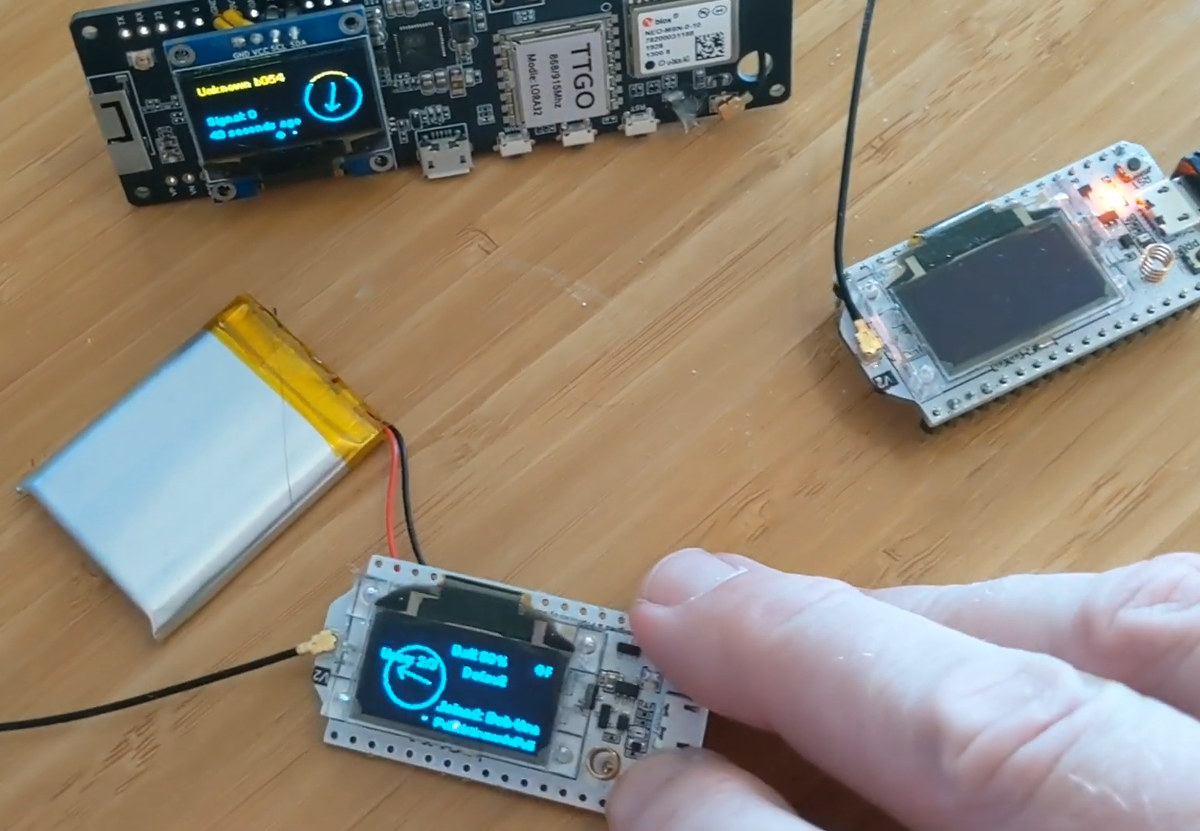
Test with another node
One node by itself is mostly a fancy blinking disappointment. To test messaging, you need another node nearby or an existing local mesh with compatible settings.
Send a short message, check signal information, move one node farther away, and test again. That is how you learn what your setup can actually do.
- Use at least two nodes for real testing
- Send short test messages
- Move farther apart gradually
- Watch signal and node list behavior
Common beginner mistakes
Most Meshtastic problems come from a short list of self-inflicted wounds. The good news is they are easy to avoid once you know where the traps are.
- Wrong region setting
- No antenna or bad antenna
- Wrong frequency hardware for the country
- Changing advanced settings too early
- Expecting magic range from bad placement
- Testing with only one node and wondering why nothing happens

Once it works, build the mesh smarter
After the first node is working, the next useful pages would be node placement, solar nodes, router/client roles, and a practical “why is nobody hearing me?” troubleshooting guide.